 |
The Life of Typhoon #1357
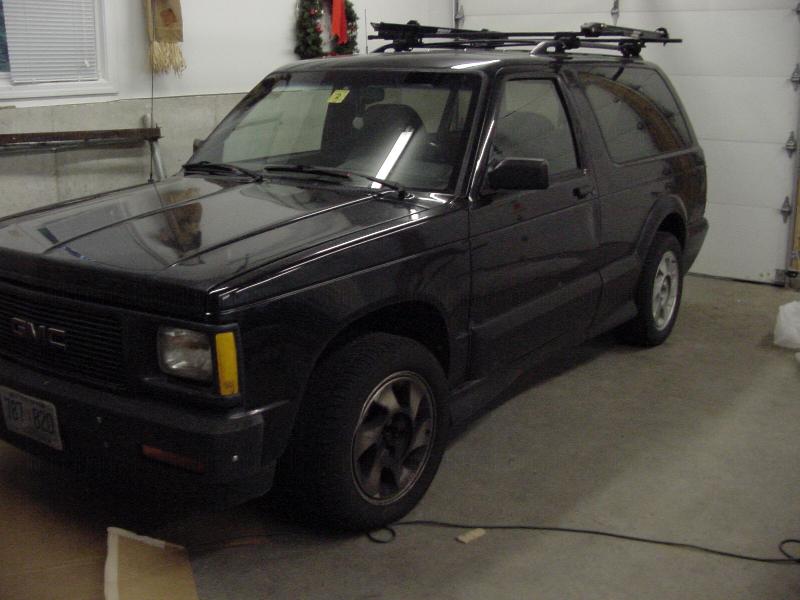
Originally sold at McDevitt GMC in Manchester, New Hampshire, this '93 Typhoon is ready for a restoration. It has lived through ten years of daily driving in the harsh Northeast winters, and has suffered the ravages of 10 years worth of road salt. Plans are to restore it to original condition with after market wheels, fiberglass fenders up front, fiberglass one peice front bumper/cladding, and dark grey metallic paint. With good luck, I'll be able to get the vanity plate MEANZ79. My new photo page is
http://photobucket.com/albums/v260/typhoon1357/
http://photobucket.com/albums/a378/typhoon1357-2/
|
Service Record
More or less, this Typhoon has had nothing outside regular oil changes. It has a new distributor and plugs. The transmission has been rebuilt, but still needs adjustment. The front bumper, left fender, and hood were replaced after hitting a stone wall. |
Metal cladding rivet removal tutorial
In order to remove the impossible GM metal cladding rivets, you will need a 3" metal cutting wheel, a flatblade screwdriver, and a pair of pliers or vice grips. A rotoZIP tool is excellet for this.
1. Cut 2 parallel slices in rivet on each side of the center pin, as close to the cladding as possible.
2. Using the srewdriver, insert into slices and twist, breaking sides from rivets. (pliers may be neccesary to remove the sides)
3. Use pliers to bend the remaining peice in, or to break it off so only the center remains.
4. Carefully pull cladding over rivet
WARNING! IF NOT PERFORMED CAREFULLY, THIS PROCESS MAY DAMAGE CLADDING! KEEP A COOL CLOTH HANDY TO COOL RIVETS IF EXCESSIVE GRINDING IS NECCESARY, OTHERWISE CLADDING CAN MELT!
This procces was discovered through carefull removal of cladding from my own Typhoon, and was performed with damage to clading in only one place, which is invisible unless you lay under the car.
|
How to remove passenger front fender:
To perform this procedure, you will need a socket set, breaker bar, and a long or a lot of short extensions, as well as a torx driver bit and a flatblade screwdriver and needlenose pliers or vice grips.
1. Disconnect and remove battery and battery tray, with one bolt into the fender, one bolt from the under side, and one into the radiator support. There is a large round thing bolted to the underside of the tray, which needs to be disconnected, by two bolts through the tray.
2. Remove windshield wiper arms by pulling small tab at bottom of arm away from shaft, and lifting the wiper arm, or prying up with small crowbar. MARK THE ARMS AND SHAFTS SO THEY GO BACK ON THE SAME WAY THEY CAME OFF!
3. Remove grille, held on by 7 torx screws, 2 above each headlight, and 3 in the grille.
4. Remove coolant reservior from inner fender, taking out 3 medium bolts.
5. At the front of the engine bay just above the battery tray, there will be three wires coming out of a plastic sheath. These both have plugs, and may pass through the inner fender. If so, disconnect them and pull out of fender, then reconnect. There will also be a vacuum hose attached to the large round thing in step 1. This runs up through the engine bay, and connects to a tee at the cowl. disconnect it and pull it out of the fender.
6. Disconnect antenna wire near back of engine bay.
7. Remove antenna
8. Looking at front of truck, there will be two bolts at the top on the radiator support, above the headlight, and one below, behind the bumper. Bumper cover may have to be removed to access this bolt (but it can probably be accessed from underneath). Remove all except the bolt closest to the hood bumpstop. Loosen this but DO NOT REMOVE YET.
9. Remove three medium and seven (I believe) large bolts from inside the fenderwell. These hold the fender to the inner fender. Behind the fender, facing out just ahead of the door, is a bolt, loosen and remove. This bolt is hard to see, feel with your hand to find it.
10. Remove two bolts and four small bolts from cowl, with the two bolts at the edges just in front, and the four small bolts along the front edge.
11. Lift cowl off.
12. There will be one bolt near the windshield. Loosen but DO NOT REMOVE YET.
13. Open door to halfway point. From inside, two bolts will be visible on the back of the fender, one at dash level and one just above the lower hinge.
14. Using a long, long extension, reach in and undo the upper bolt, which can be removed from outside with needlenose pliers.
15. Using long extension and universal joint, remove lower bolt.
16. Underneath the battery tray there is one bolt put in from the inside. Take out the bolt. It can be removed earlier, but helps to position the fender.
17. The hood hinge is attached under the cowl. This will also have to be unbolted. If you are going to be doing engine work, or yanking the engine, this would be a good time to remove the hood, as it cannot be safely opened without the fender in place.
18. Remove bolt by windshield from step 12, and bolt on grille support in step 8. (these bolts were retained to keep fender in position)
19. Fender should be loose and can be wiggled free.BE VERY CAREFUL OF BUMPER EDGE WHILE REMOVING FENDER, AS IT CAN SCRATCH THE PAINT.
20. Installation is reverse of this procedure
This procedure is how I removed my passenger front fender. After removal, you should have 7 torx screws, 6 small bolts, 6 medium bolts, and 20 large bolts.
Contact Me
Searching For:
Currently in search of: Typhoon console inner lid and hinge. |

God Bless America
The odometer reading is no very accurate at 134,516.35 miles, but that is what it says. About 6 months worth of mileage is missing, putting it close to 150,000 miles.
|


